mirror of
https://github.com/jxpeng98/obsidian-to-NotionNext
synced 2026-07-29 08:08:34 +08:00

113 lines
4.7 KiB
Markdown
113 lines
4.7 KiB
Markdown
---
|
||
title: 配置数据库
|
||
description: 在 Obsidian to NotionNext 插件中配置 Notion 数据库的指南
|
||
---
|
||
|
||
# 配置数据库
|
||
|
||
在安装好插件并获取了 Notion API 令牌和数据库 ID 之后,你就可以开始配置要同步的数据库了。
|
||
|
||
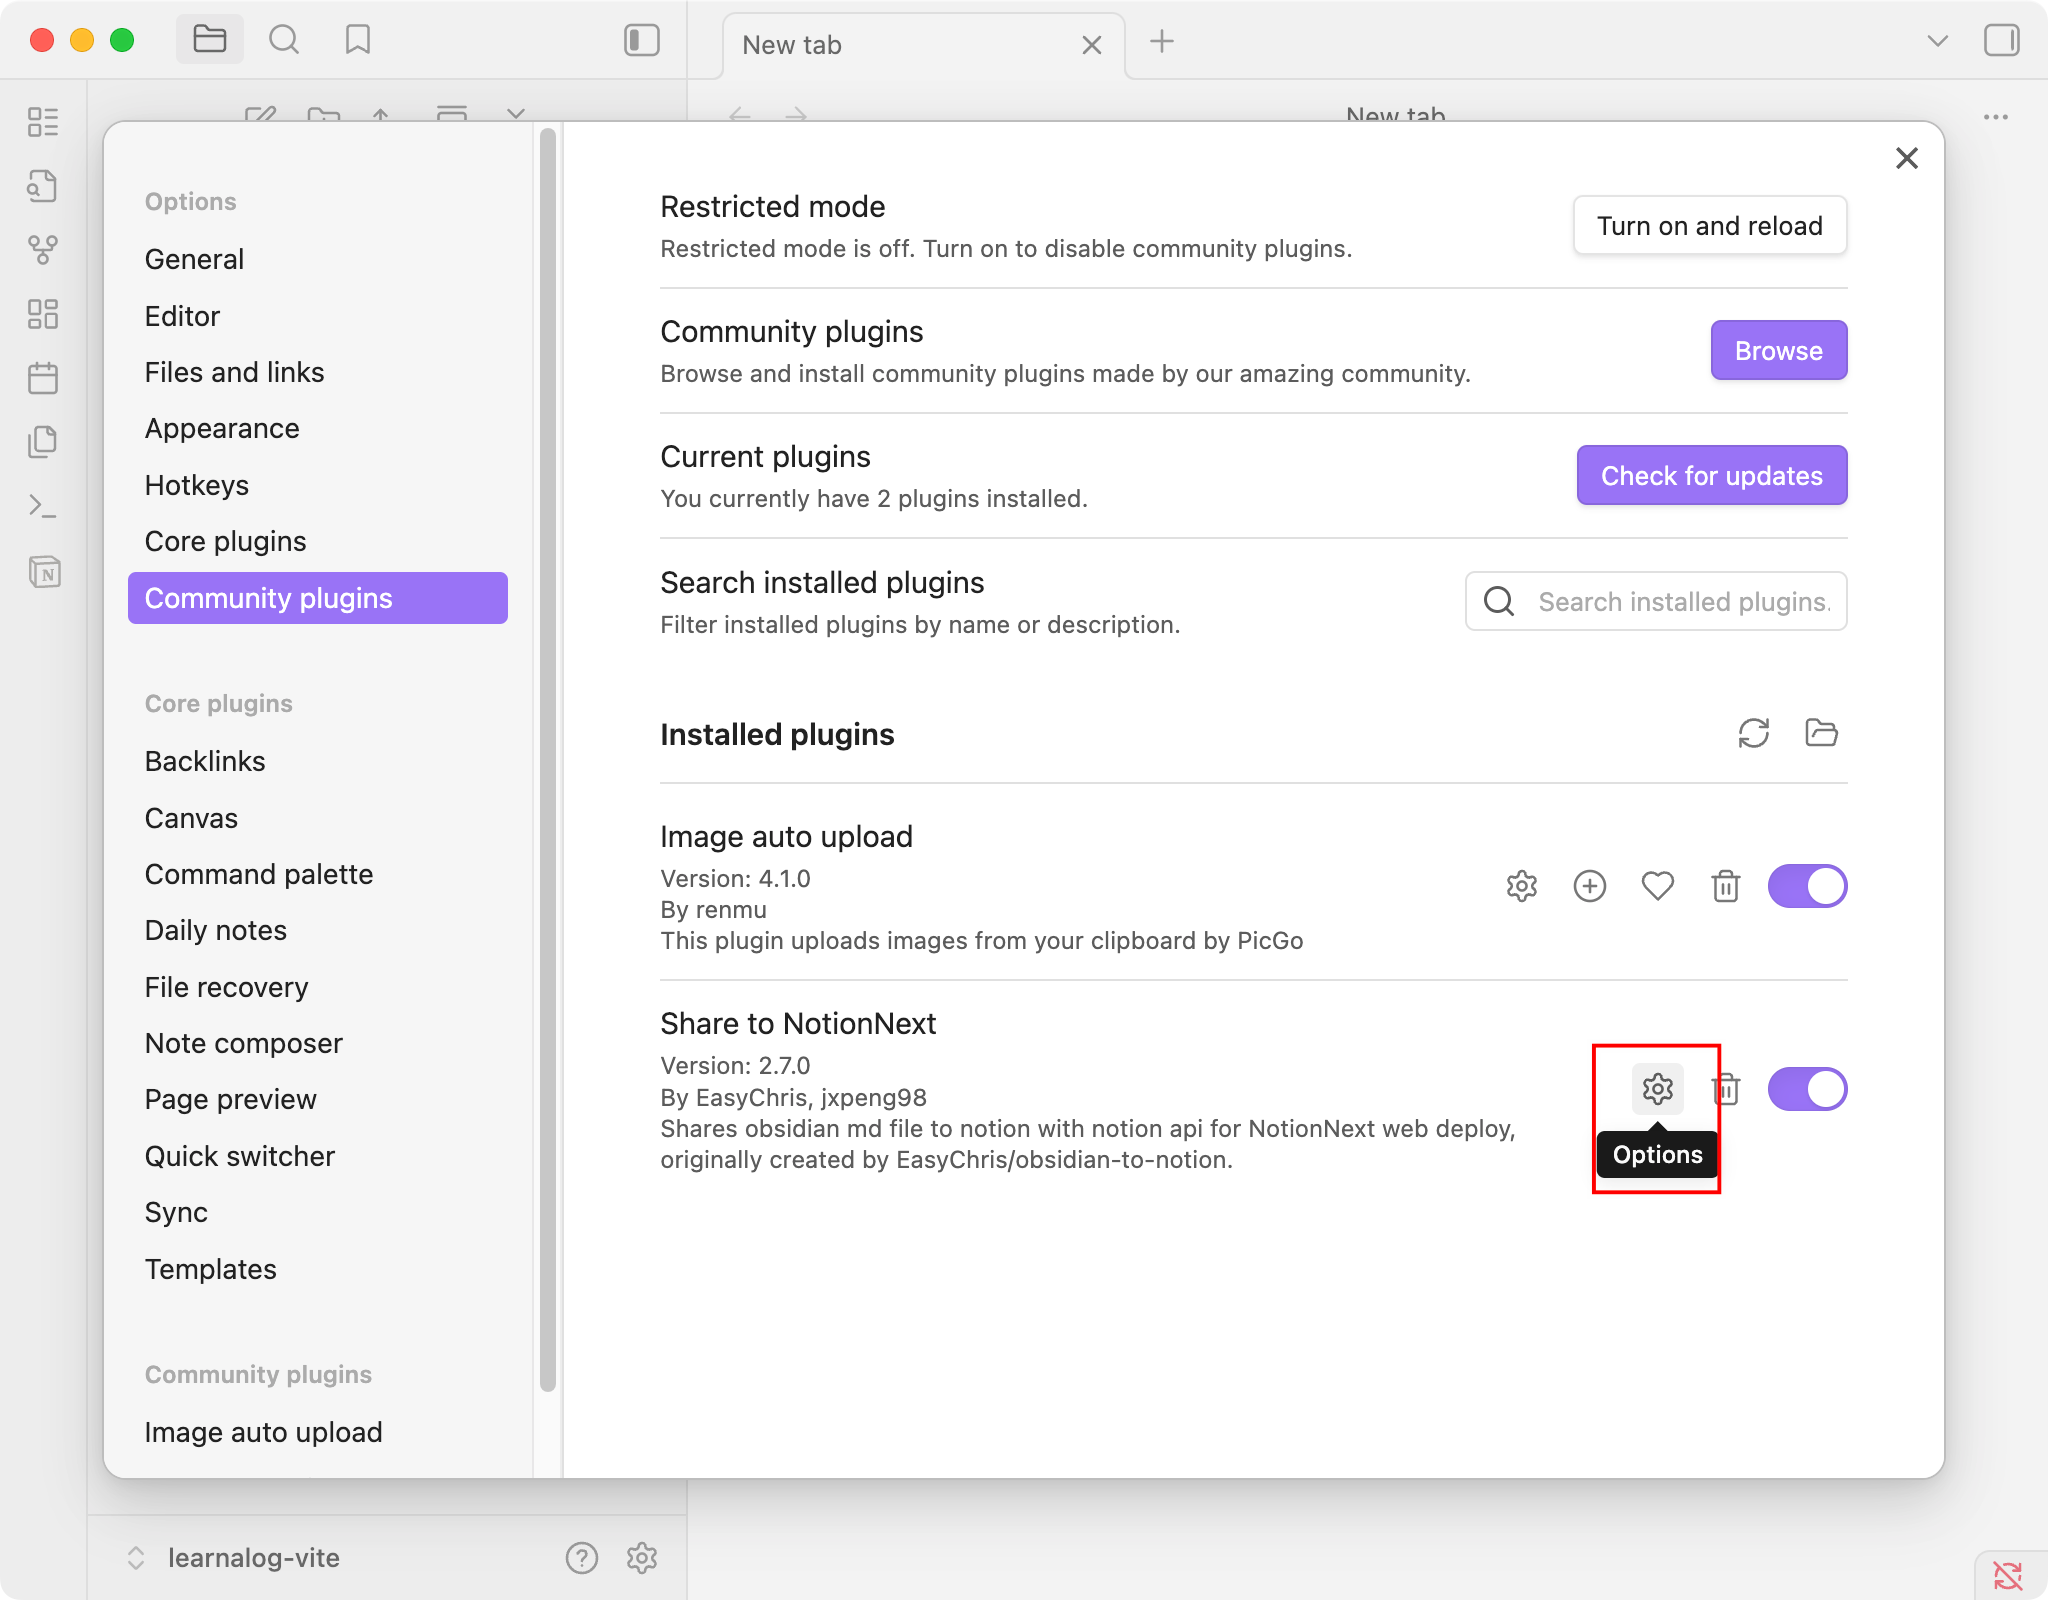
首先,在 Obsidian 中打开插件设置。
|
||
|
||
|
||
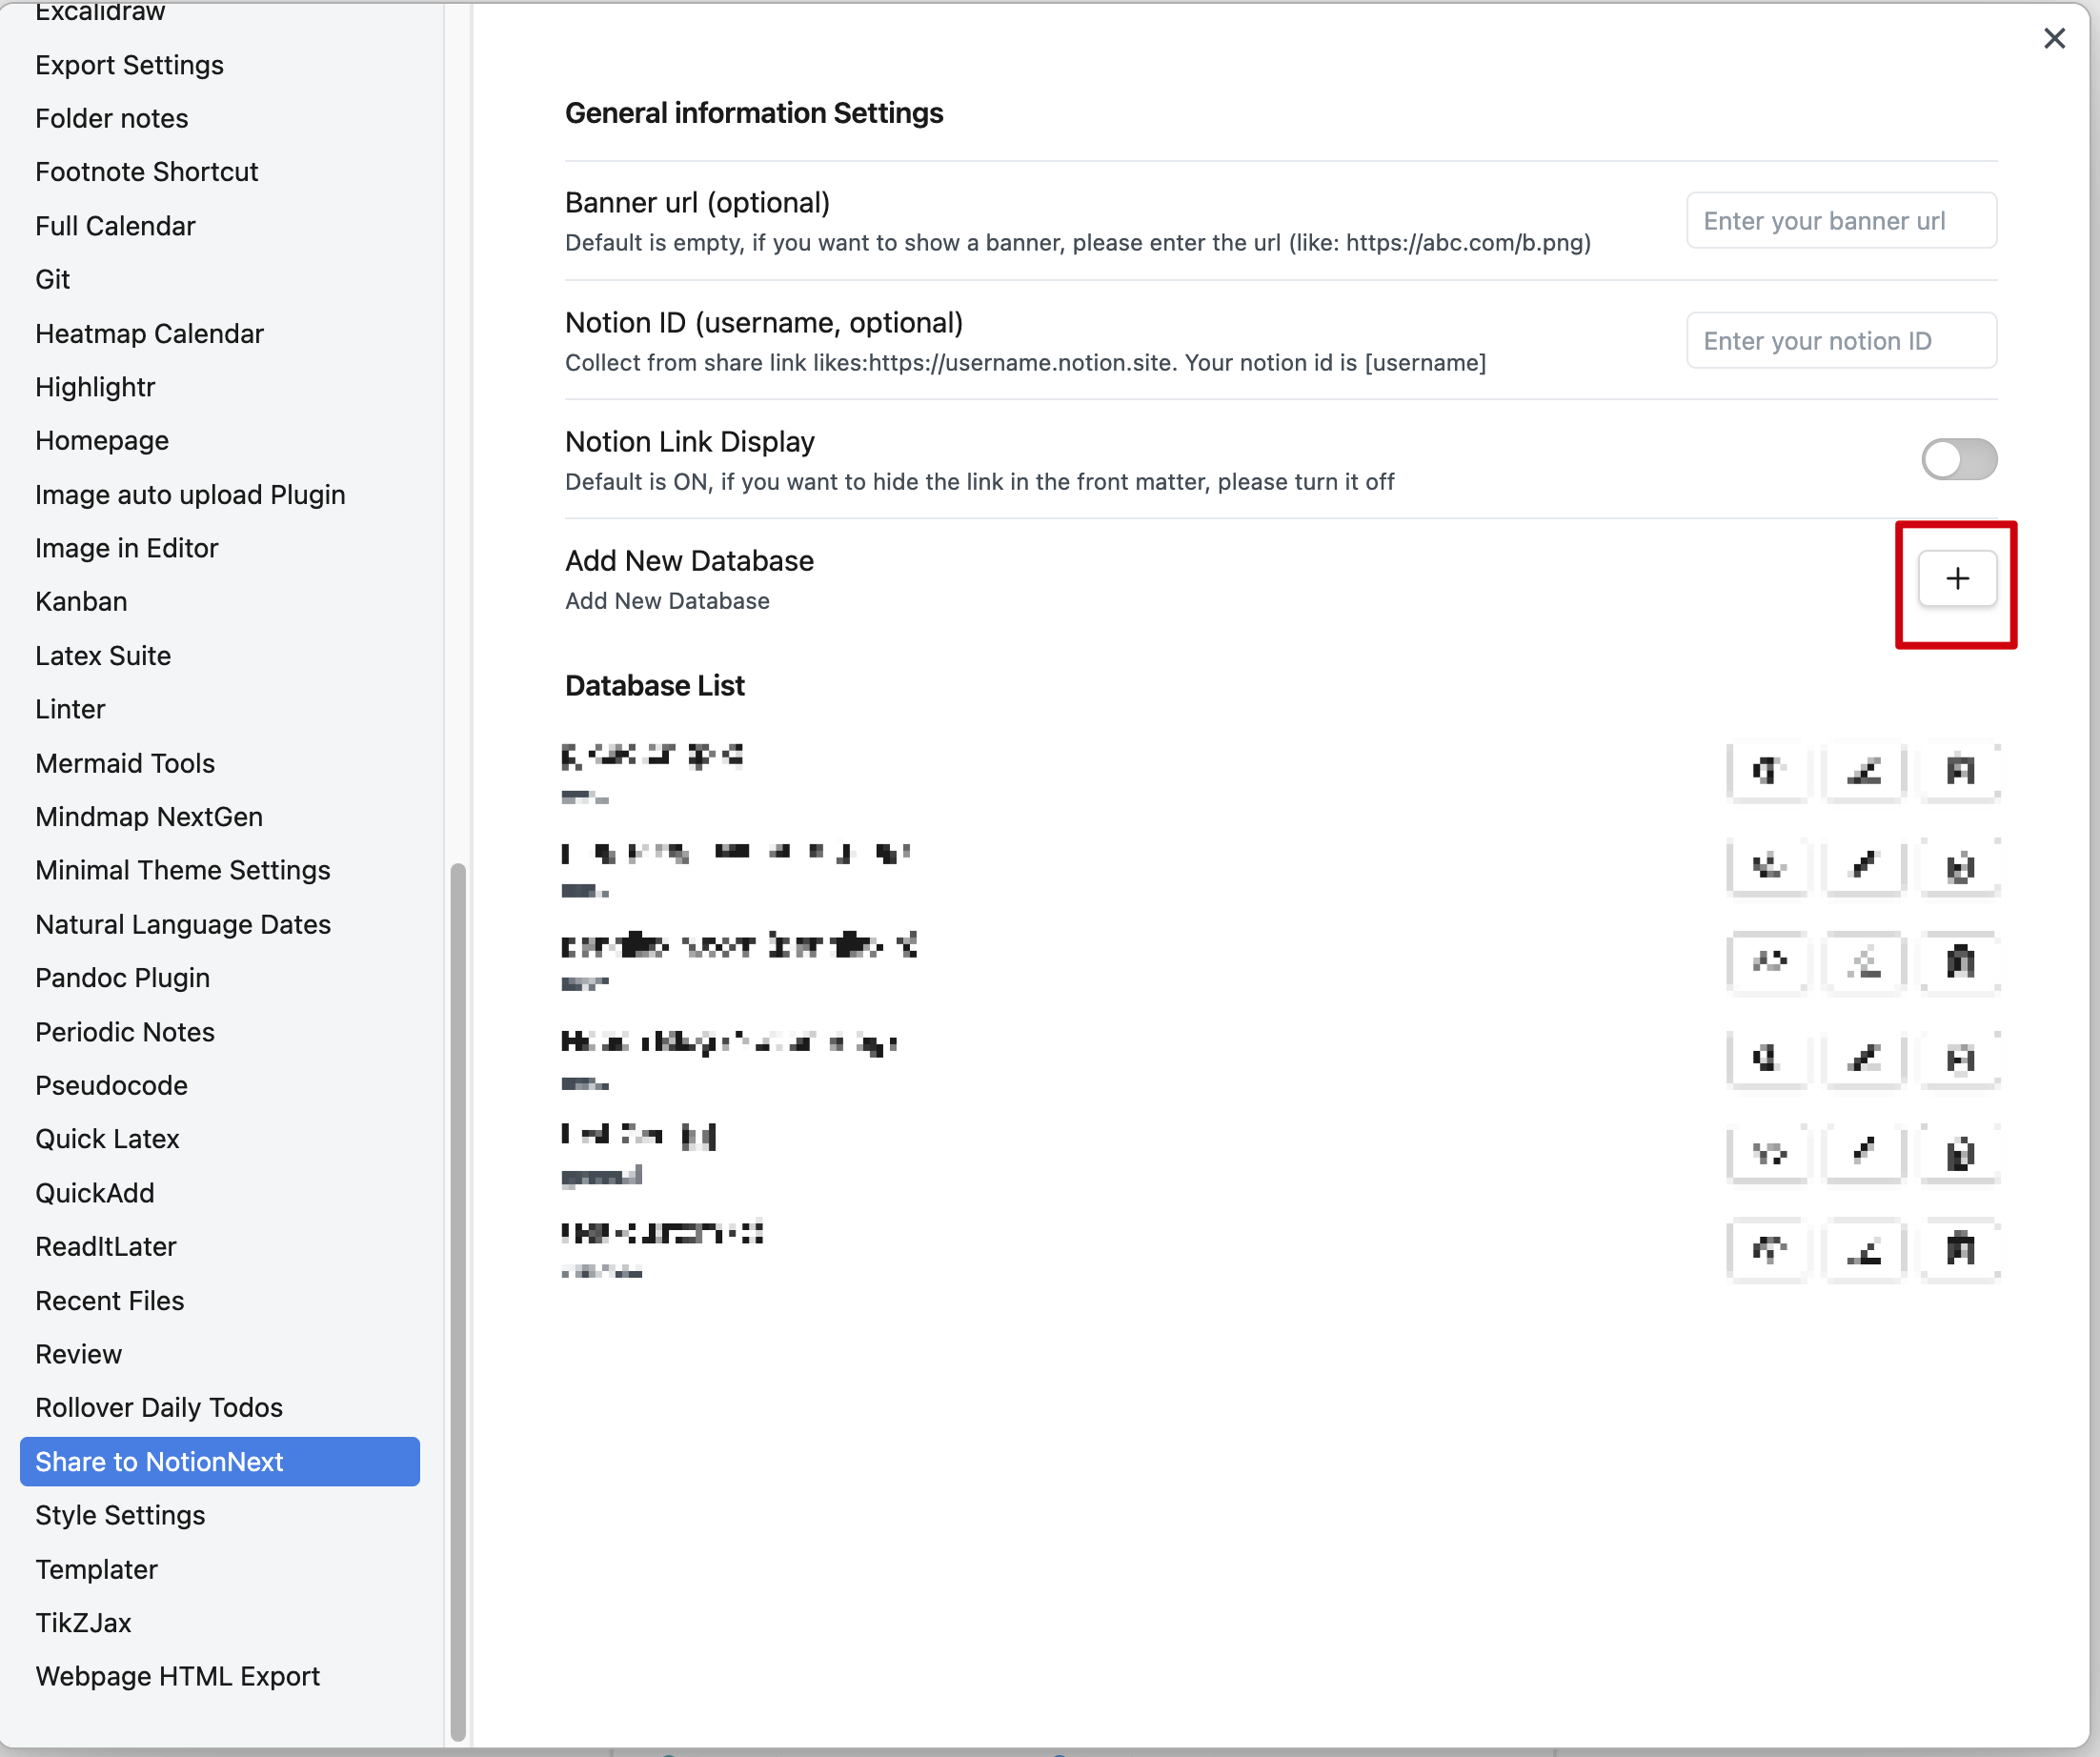
点击 “添加新数据库” 来创建一个新的数据库配置。
|
||
|
||
|
||
|
||
插件支持三种类型的数据库配置,你可以根据自己的需求选择。
|
||
|
||
- [数据库配置](#数据库配置)
|
||
- [1️⃣ 通用数据库](#1️⃣-通用数据库)
|
||
- [2️⃣ NotionNext 数据库](#2️⃣-notionnext-数据库)
|
||
- [3️⃣ 自定义数据库](#3️⃣-自定义数据库)
|
||
- [完成配置](#完成配置)
|
||
|
||
## 1️⃣ 通用数据库
|
||
|
||
这是最基础的数据库类型,适合大多数用户。
|
||
|
||
**配置项:**
|
||
|
||
- **数据库全名**: 给这个数据库配置起一个容易识别的名字。
|
||
- **Notion API 令牌**: 你在第一步中获取的 API 令牌。
|
||
- **数据库 ID**: 你在第二步中获取的数据库 ID。
|
||
|
||
**Notion 数据库要求:**
|
||
|
||
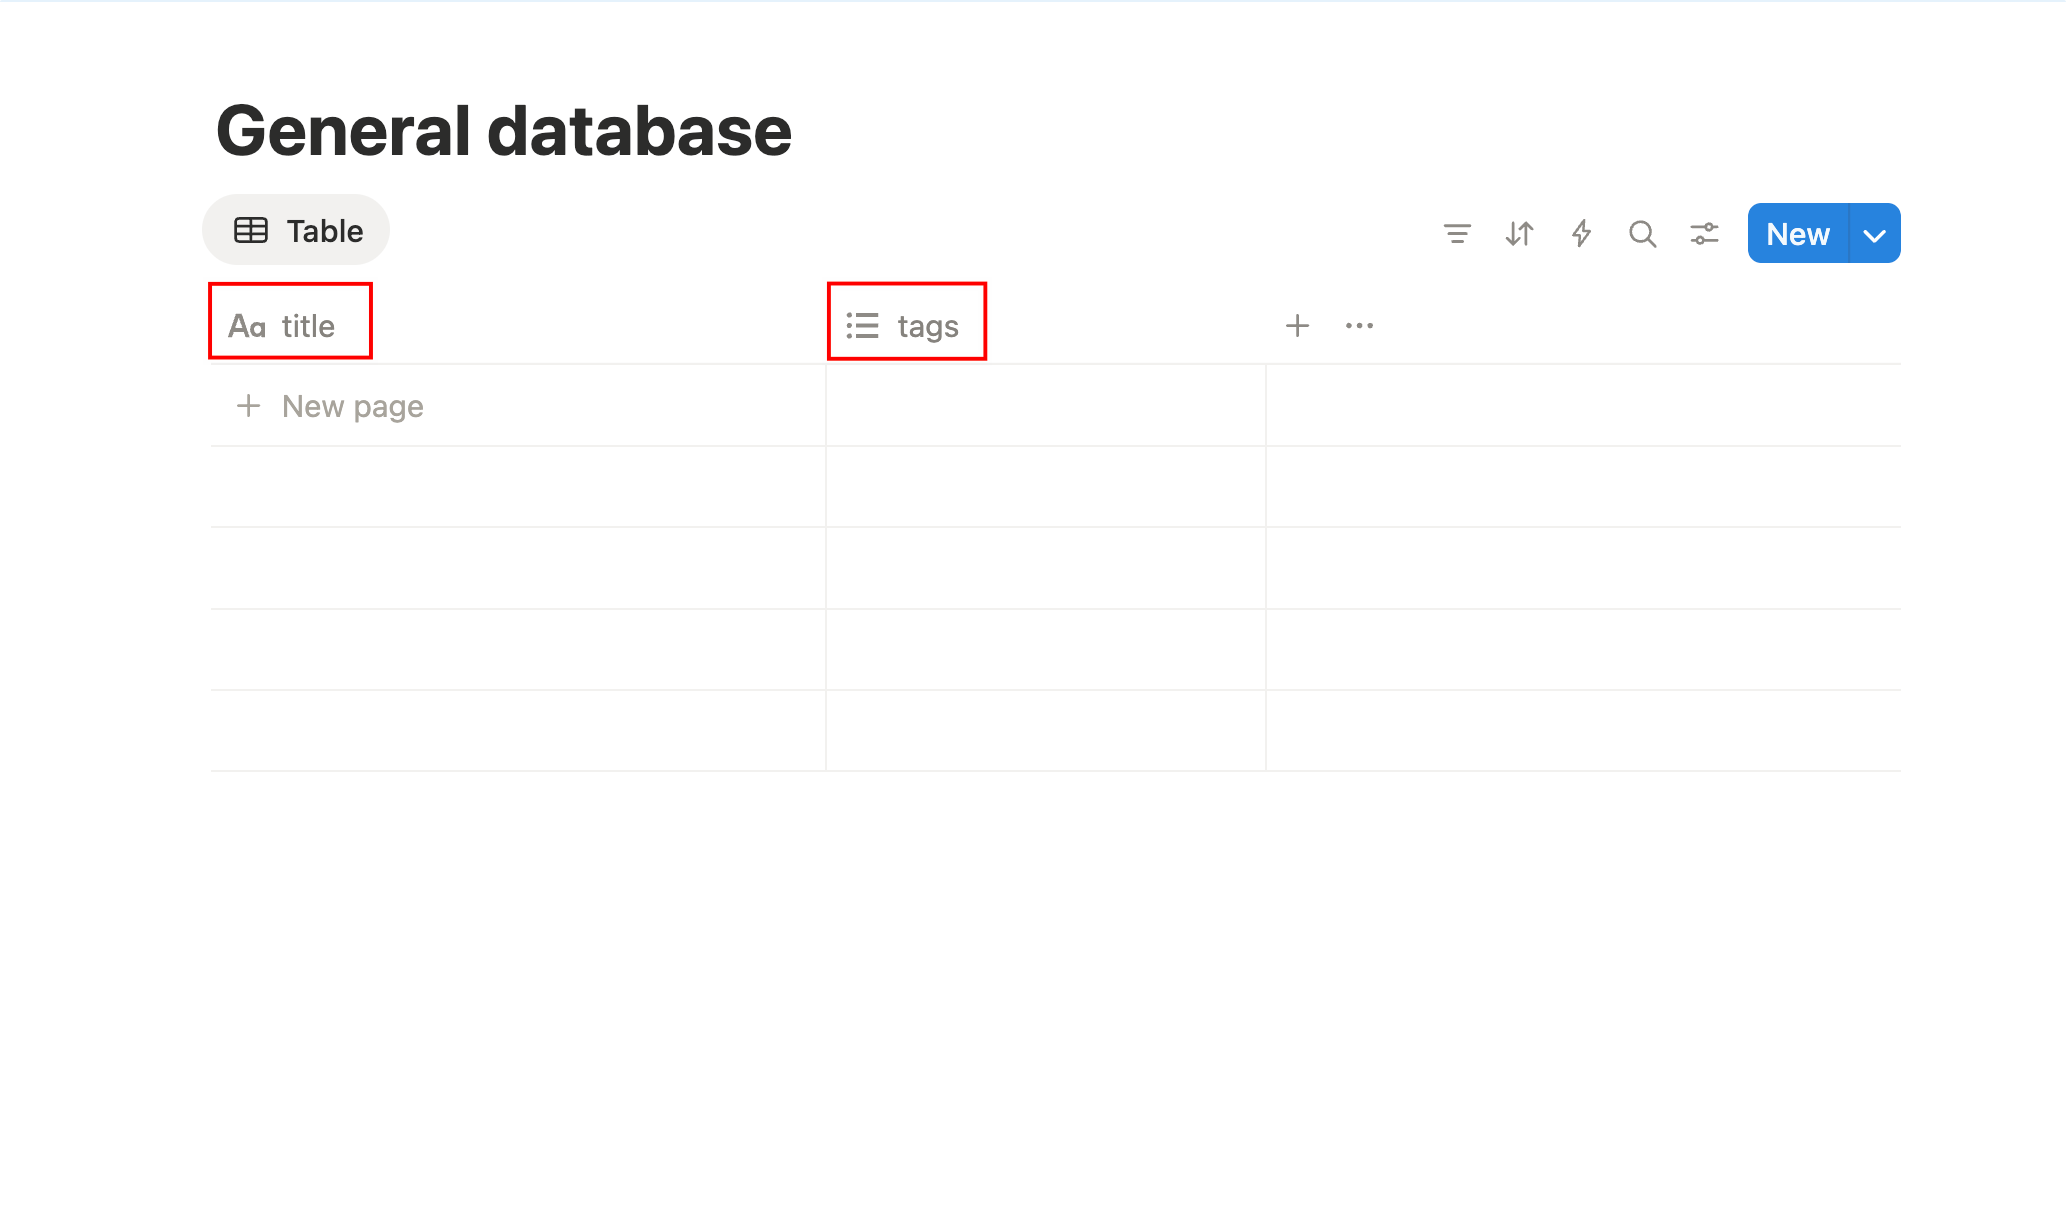
- 必须包含一个名为 `title` 的 `Title` 属性。
|
||
- 必须包含一个名为 `tags` 的 `Multi-select` 属性。
|
||
|
||
|
||
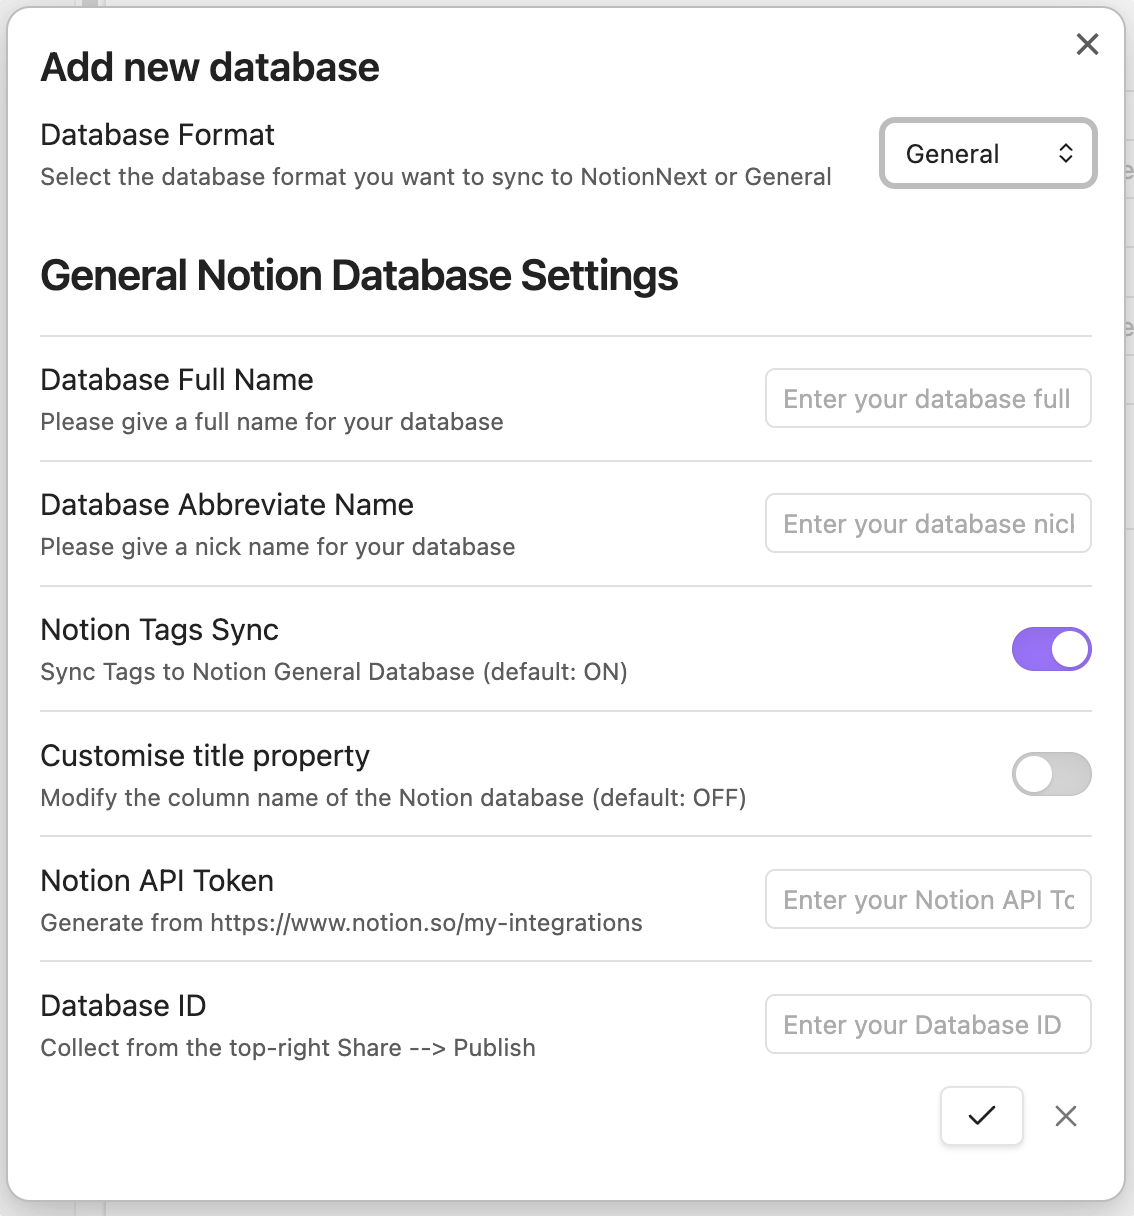
然后,像下面这样填写配置字段:
|
||
|
||
- **数据库全名 (Database Full Name)**: 你希望这个数据库在列表中显示的名字(例如:“学习资料库”)。
|
||
- **数据库简称 (Database Abbreviate Name)**: 一个简短的别名(例如:“learning”)。
|
||
- **同步 Notion 标签 (Notion Tags Sync)**: 如果希望将 Obsidian 的标签同步到 Notion,请启用此选项(**启用后,请确保你的笔记中包含 `tags`**)。
|
||
- **自定义标题属性 (Customise title property)**: 你想用作主列的 Notion 数据库属性(默认为 `title`)。
|
||
- **Notion API 令牌 (Notion API Token)**: 你在第一步中获取的 API 令牌。
|
||
- **数据库 ID (Database ID)**: 你在第二步中获取的数据库 ID。
|
||
|
||
|
||
|
||
## 2️⃣ NotionNext 数据库
|
||
|
||
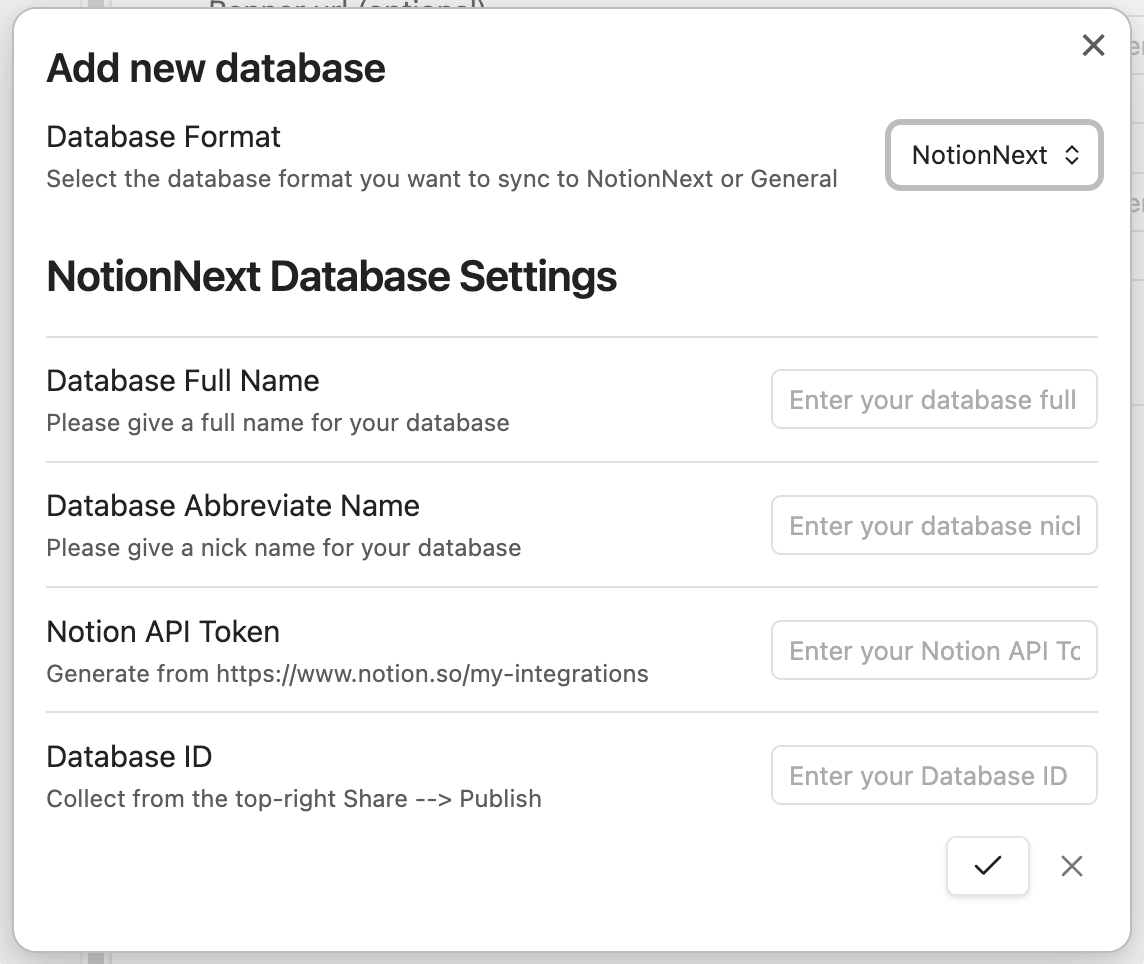
这个类型是为 [NotionNext](https://github.com/tangly1024/NotionNext) 博客系统的用户量身定制的,其属性已预设好以匹配 NotionNext 模板。
|
||
|
||
配置方式与通用数据库类似:
|
||
|
||
- **数据库全名**: 为这个数据库配置起一个名字。
|
||
- **数据库简称**: 一个简短的别名。
|
||
- **Notion API 令牌**: 你在第一步中获取的 API 令牌。
|
||
- **数据库 ID**: 你在第二步中获取的数据库 ID。
|
||
|
||
|
||
|
||
## 3️⃣ 自定义数据库
|
||
|
||
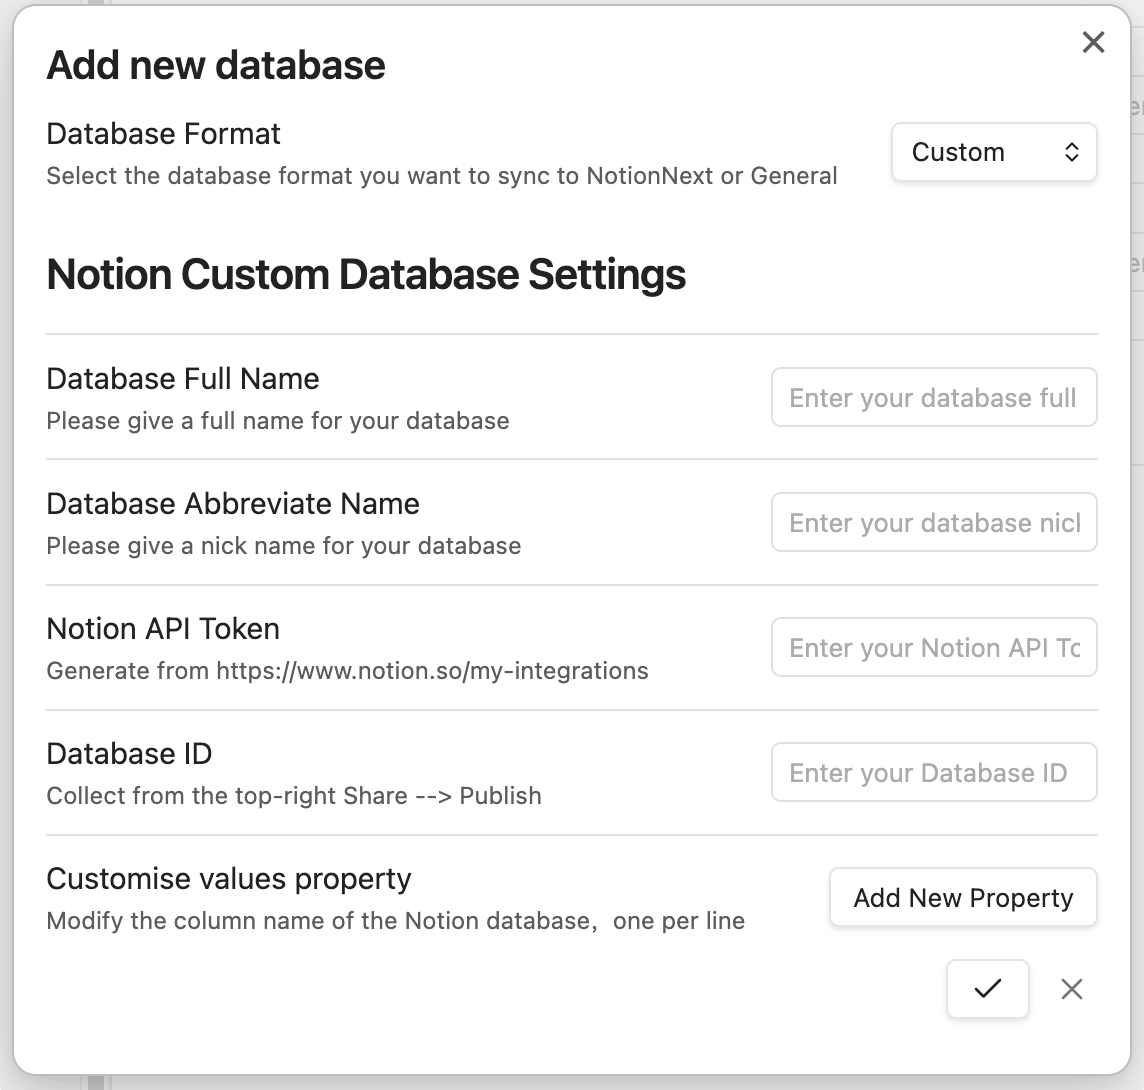
这个类型为高级用户提供了极大的灵活性,允许你将 Obsidian 笔记中的任何 frontmatter 元数据映射到 Notion 数据库的任意属性。
|
||
|
||
首先,你需要像配置通用数据库一样填写基本信息:
|
||
- **数据库全名**: 为这个数据库配置起一个名字。
|
||
- **数据库简称**: 一个简短的别名。
|
||
- **Notion API 令牌**: 你在第一步中获取的 API 令牌。
|
||
- **数据库 ID**: 你在第二步中获取的数据库 ID。
|
||
|
||
|
||
|
||
填写完基本配置后,你就可以开始添加新的属性映射了。
|
||
|
||
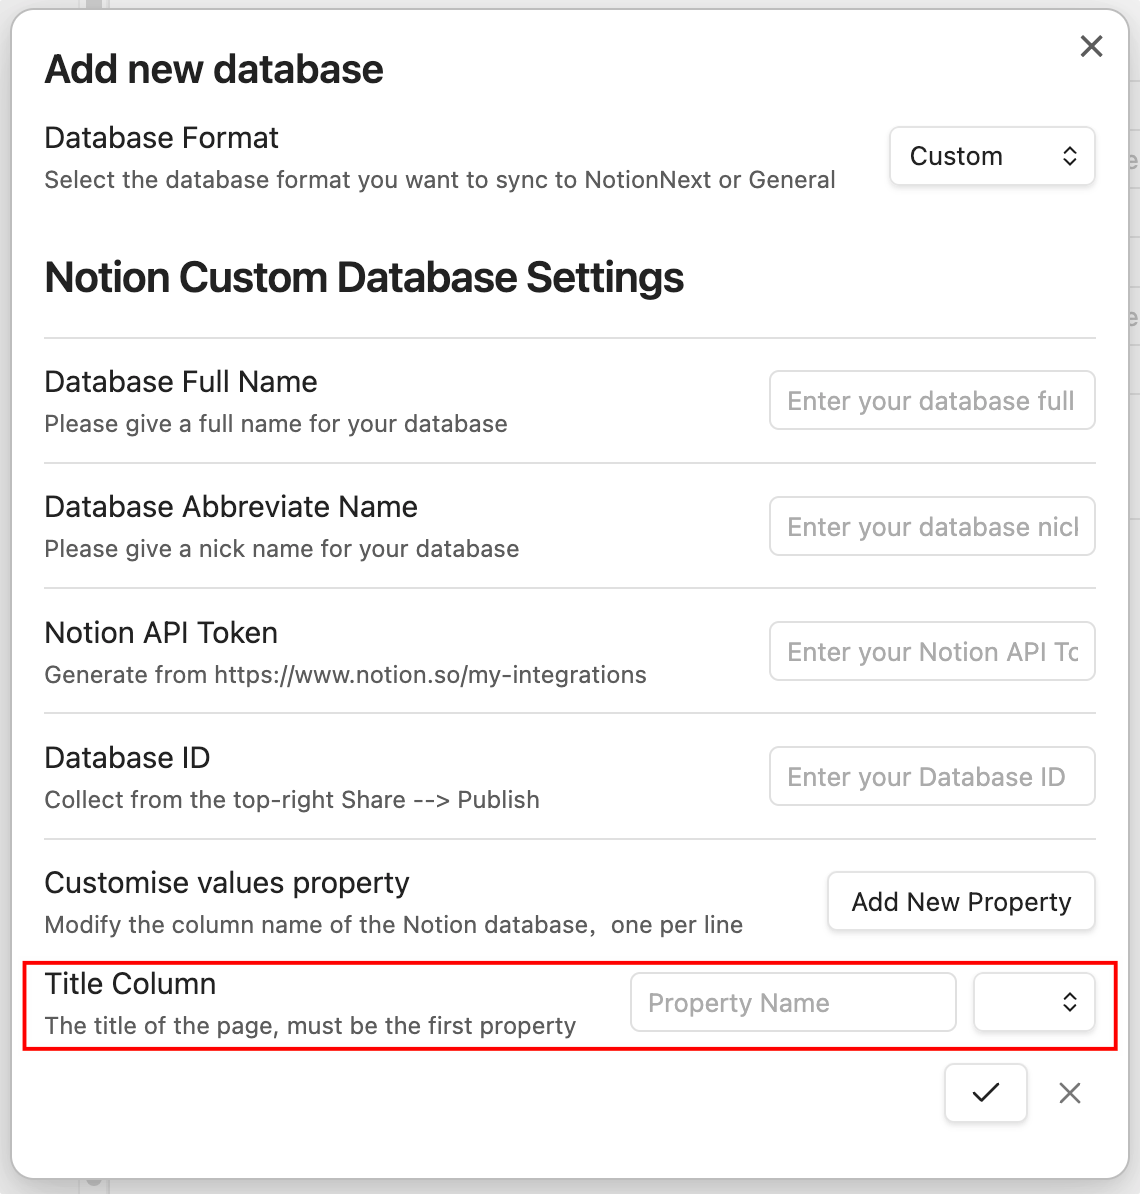
你可以点击 `Add New Property` 按钮来创建一个新的属性映射。
|
||
|
||
首先,你需要添加标题属性的映射,这是 Notion 数据库正常工作所必需的。
|
||
|
||
|
||
|
||
::: tip
|
||
请记住,"Notion 属性 (Notion Property)" 需要填写你在 Notion 数据库中的属性名称(区分大小写),而 "Frontmatter 键 (Frontmatter Key)" 则是你 Obsidian 笔记 frontmatter 中的键。
|
||
:::
|
||
|
||
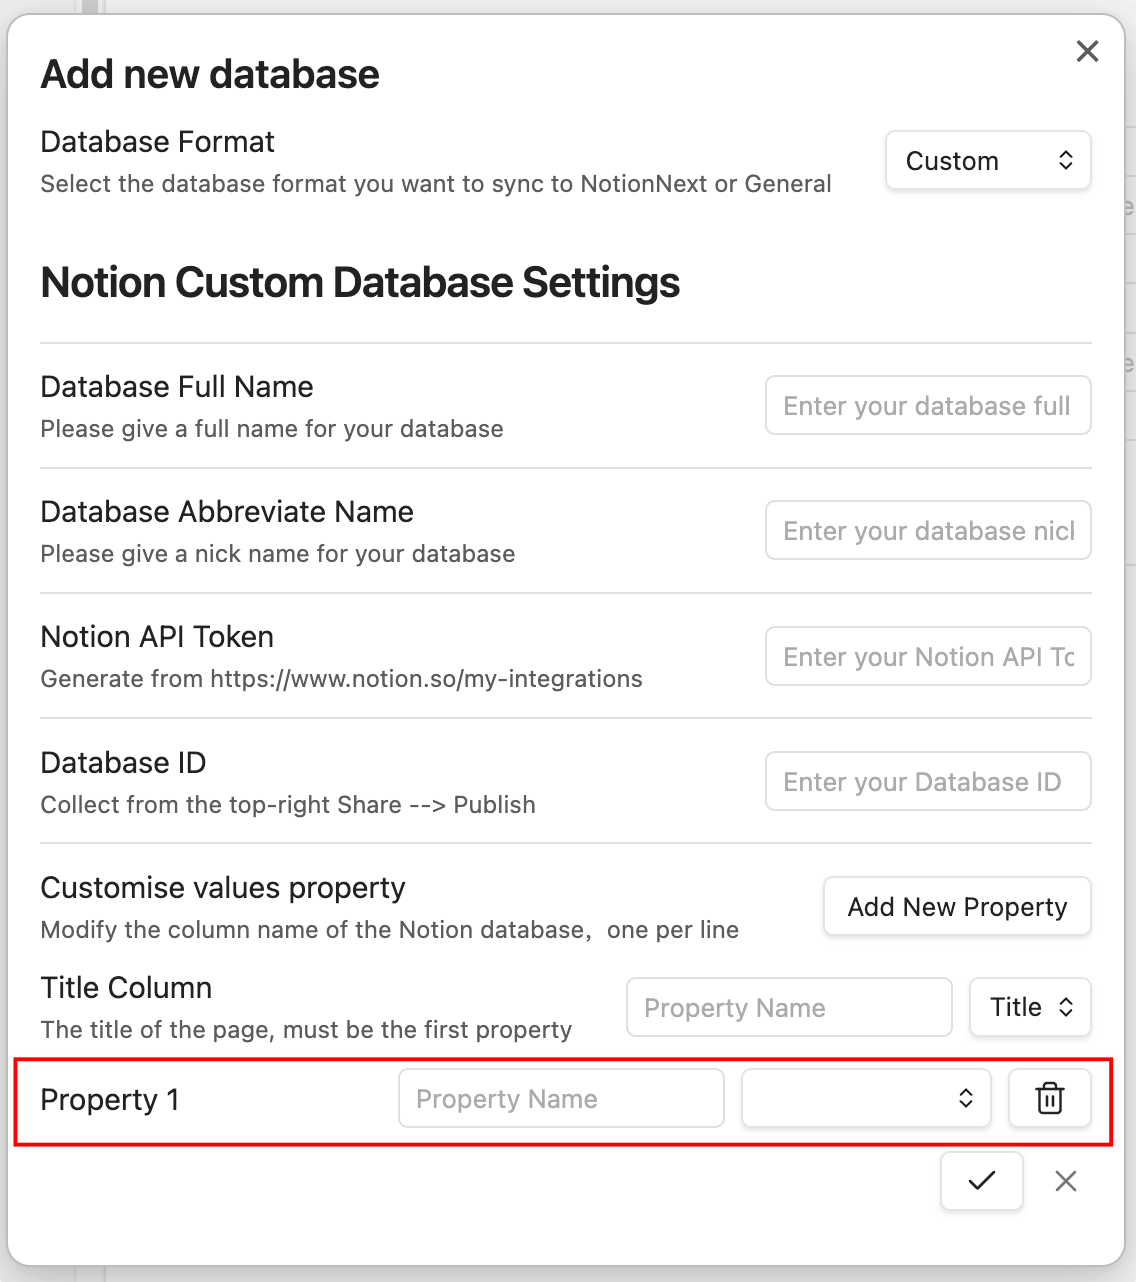
添加完标题属性后,你可以根据需要继续添加更多属性。
|
||
|
||
|
||
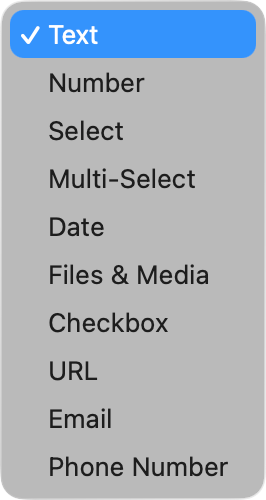
目前,插件支持以下 Notion 属性类型:
|
||
- Text
|
||
- Number
|
||
- Select
|
||
- Multi-select
|
||
- Date
|
||
- Files & Media
|
||
- Checkbox
|
||
- URL
|
||
- Email
|
||
- Phone Number
|
||
|
||
|
||
|
||
::: info
|
||
关联(Relation)和汇总(Rollup)类型暂时还不支持。
|
||
:::
|
||
|
||
## 完成配置
|
||
|
||
配置完数据库后,请确保保存你的设置。现在,你可以通过命令面板或笔记右键菜单中的 “Share to NotionNext” 命令,开始将你的 Obsidian 笔记同步到配置好的 Notion 数据库了。
|